Showing posts with label Craft. Show all posts

Tuesday, August 18, 2015

Grumpy Cat Cross Stitch

You'll notice I've been on a cross stitch kick lately...with Grumpy Cat! The one above, I made for a friend.

I saw this on vacation and knew I had to make it a cross stitch too! But this one is for ME.

It's so easy to make any picture a cross stitch. I just draw it free hand on the aida cloth and fill it in with 'x'es. Use a pencil in case you mess up- like I do..

Tuesday, February 3, 2015

DIY Valentines Day garlands

I love decorating for Valentine's Day- it's one of my favorite holidays. Maybe that's because of the lovely colors involved (PINK!).
So I made some pretty heart streamers for the windows. They were really easy : just cut out a bunch of pink paper hearts and sew them down the middle, leaving a length of thread in between each one.

But the letter garland is my favorite so far! I saw something similar on Pinterest.com and decided to make one of my own.
You just fold up some paper into envelopes and decorate them. Then I used some thread to string them together. Mine was made quite small scale but you could certainly  go big!

Have Fun!

Friday, April 18, 2014

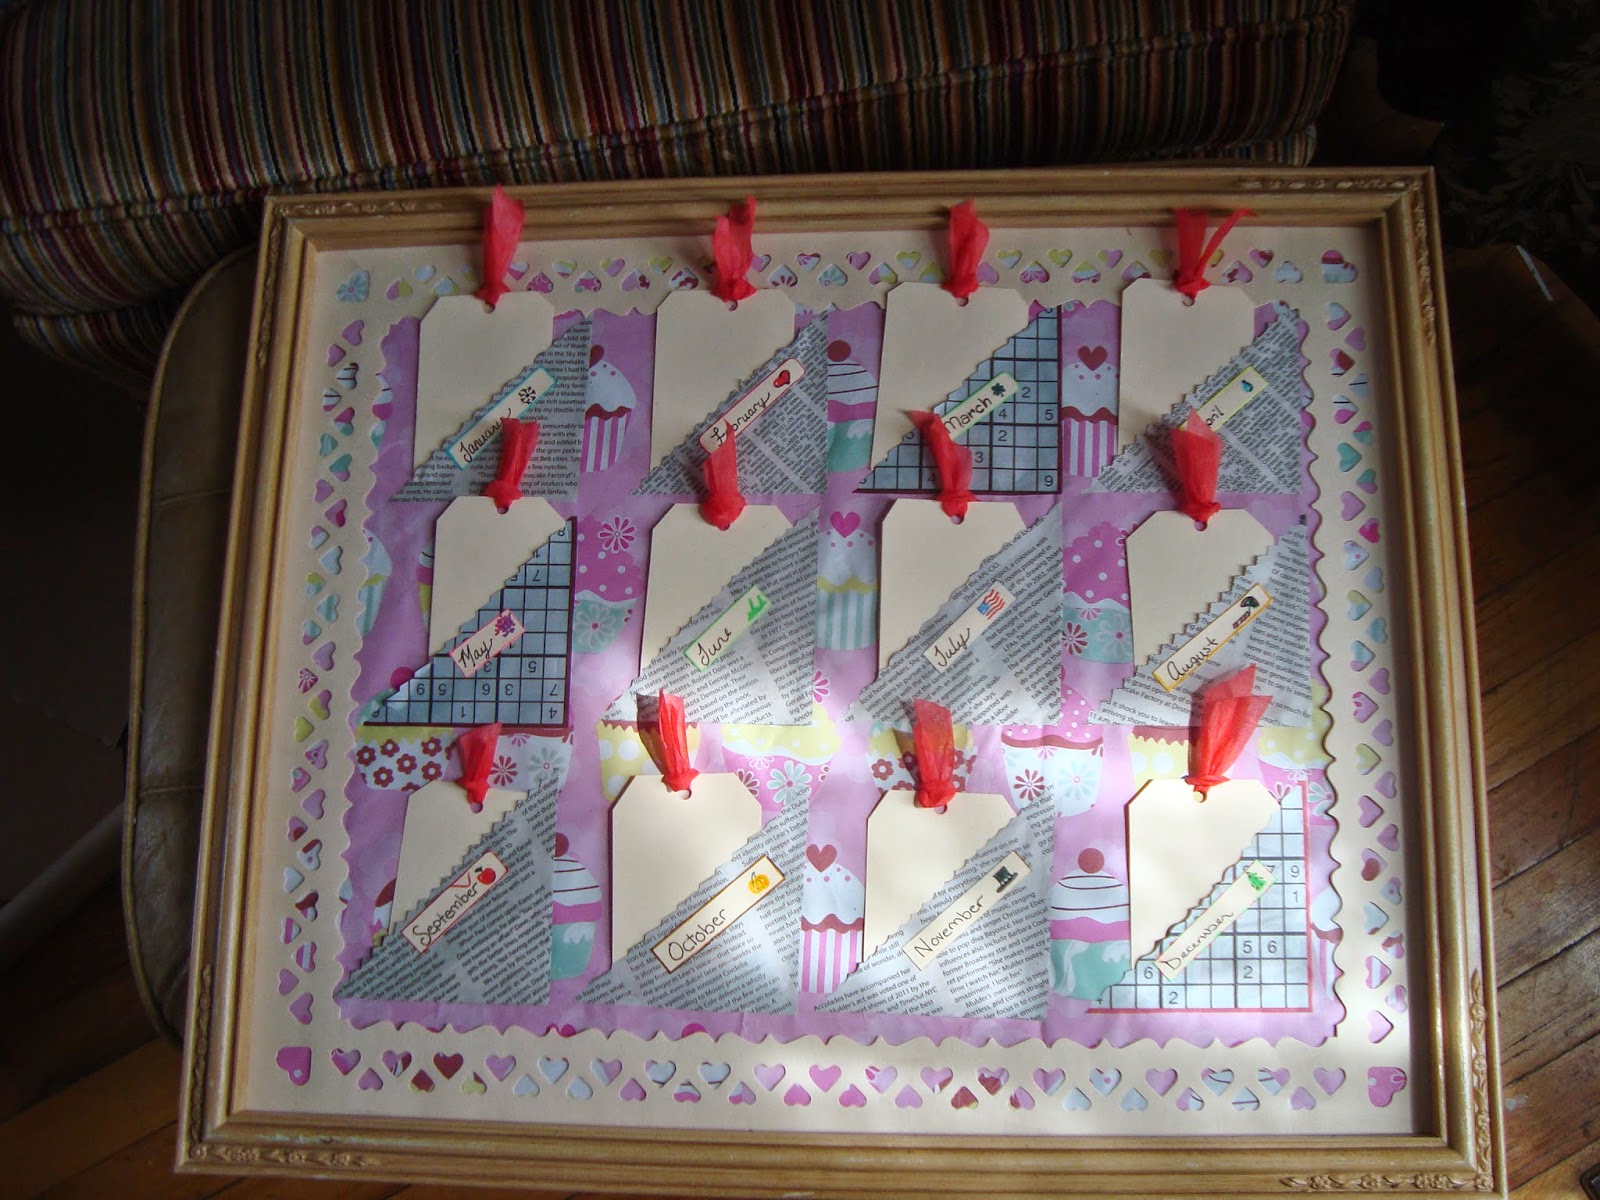
DIY Birthday Board ~Never forget a Birthday!

Found this fantastic frame at the Flea Market and knew I could use it for something! It even came with that pretty heart border~ what a steal!

I go gaga over details like this!

So I took everything out of the frame. The picture was on a piece of cardboard that I covered with some wrapping paper.

Now to use my other flea market find...decorative edge scissors (all four for $2!!!). Next, I cut out 6 squares 4"x4" ( I determined the size by the dimensions of my frame with the heart border in place, 16x12. Before cutting, figure out what size yours should be and how you want them positioned, etc). I used the decorative shears to cut each square in half diagonally.

Then I positioned them on the board like pockets and put glue just along the two edges ( the horizontal and the vertical edges). This way they are open on the diagonal so you can use it as a pocket!

Now for some tags! I cut my tags out of cardstock using a ruler as a straight edge (well, and to measure too). My tags are 2.5"x3.5". Punch holes in the tops and tie a cute ribbon through each one.

The tags fit in to the pockets. Each  pocket is a month of the year, so label the days on the tags and write in the birthdays of your loved ones.


Oh! I almost forgot! Make little cute labels for each month and glue onto the corresponding pocket. I used leftovers pieces of cardstock from making the tags and some markers.

Saturday, March 29, 2014

Latest Projects- Home Decor

I'm pretty proud of this one! Found a way to disguise my bookshelf! I used lace curtains for the first layer so I can still get  into the book shelf part. The top layer is an old sheet that I draped over it and then cut straight up the center. I made some bows out of scrap fabric and lace then used them to secure the slit open, sewing them in place where I wanted the parting.

Found this tray at a garage sale. Thought I'd freshen it up with some paint.

I think I will use some stamps to put a pattern on it. Or I could decoupage it...Or it does look nice like this too..
Decisions, Decisions!

Sunday, December 1, 2013

Easy Halloween Pumpkins

Here are my Halloween pumpkins!
I wanted to decorate my door this year so I made a Jack-o-Lantern that won't rot!

Some cardboard boxes were cut up into pumpkin shapes and decorated with construction paper. Easy, right?

Then I just glued some paper scraps on the back so I could run some string through them and hang it!

Sunday, September 8, 2013

Memory Jars DIY

We took a trip to Long Island recently and I just love collecting little pebbles and shells and such so I came up with a way to put these little gems to use!

It's such a nice way to save these little memories.

I found this great big shell which was lucky since I didn't think to bring a sand container along! The big shell didn't fit in my jar but it carried the sand for me!!
I came back from the trip to find the first of my homegrown 'maters all ready for snacking!

Birthday Cake Mix CD DIY

My boyfriend had a birthday not too long ago and so I whipped up a little birthday cake mix for him!
Check it out! I took 2 pieces of cardboard (thin like cereal boxes), traced a CD sized square, cut them out, punched holes, tied them together, and then decorated!

oh! and I compiled a bunch of awesome swing/blues songs on a CD to slip inside. Can't forget that part!

Also got to see the Franklins while they were in town. Incredible machines!! and Still running about a century later..how does your car measure up? lol.

Friday, July 5, 2013

Patriotic Baseballs for a Festive Centerpiece

This is a project for those old baseballs. Mine was an old Red Wings ball.
I started by tracing 3 sizes (big, medium, tiny) of stars on the middle section.
Then I painted the background blue, carefully leaving the stars white.


As you've probably already guessed, the next step is to paint red and white stripes on the unpainted section.

I found it helpful to draw the lines before painting.

It looks great! Imagine a bunch of these in a bowl. Bam! Patriotic centerpiece.


Friday, May 17, 2013

Garden Gnomes Galore!

OHMYGOSH! These were so much fun to make.

 I cut some pretty basic shapes out of colored paper (rectangle, half circle, triangles, etc) and glued together.

But where do you see gnomes but in gardens?
 So I decided to make him into a plant stake (translation: I needed to make him a little more durable).

Mod Podge to the rescue! Yes, my Mod Podge bottle has a superhero cape but that's another story...
Next up: get one of those handy, multi purpose wooden skewers (or you could use real plant stakes, but who does that?) and tape the cute little guy to it.  Tape on the backside.

Bah! Who can help but love this?! They are going to snazz up all the planters in my new apartment!

Thursday, December 27, 2012

Make your Own Giftbags!

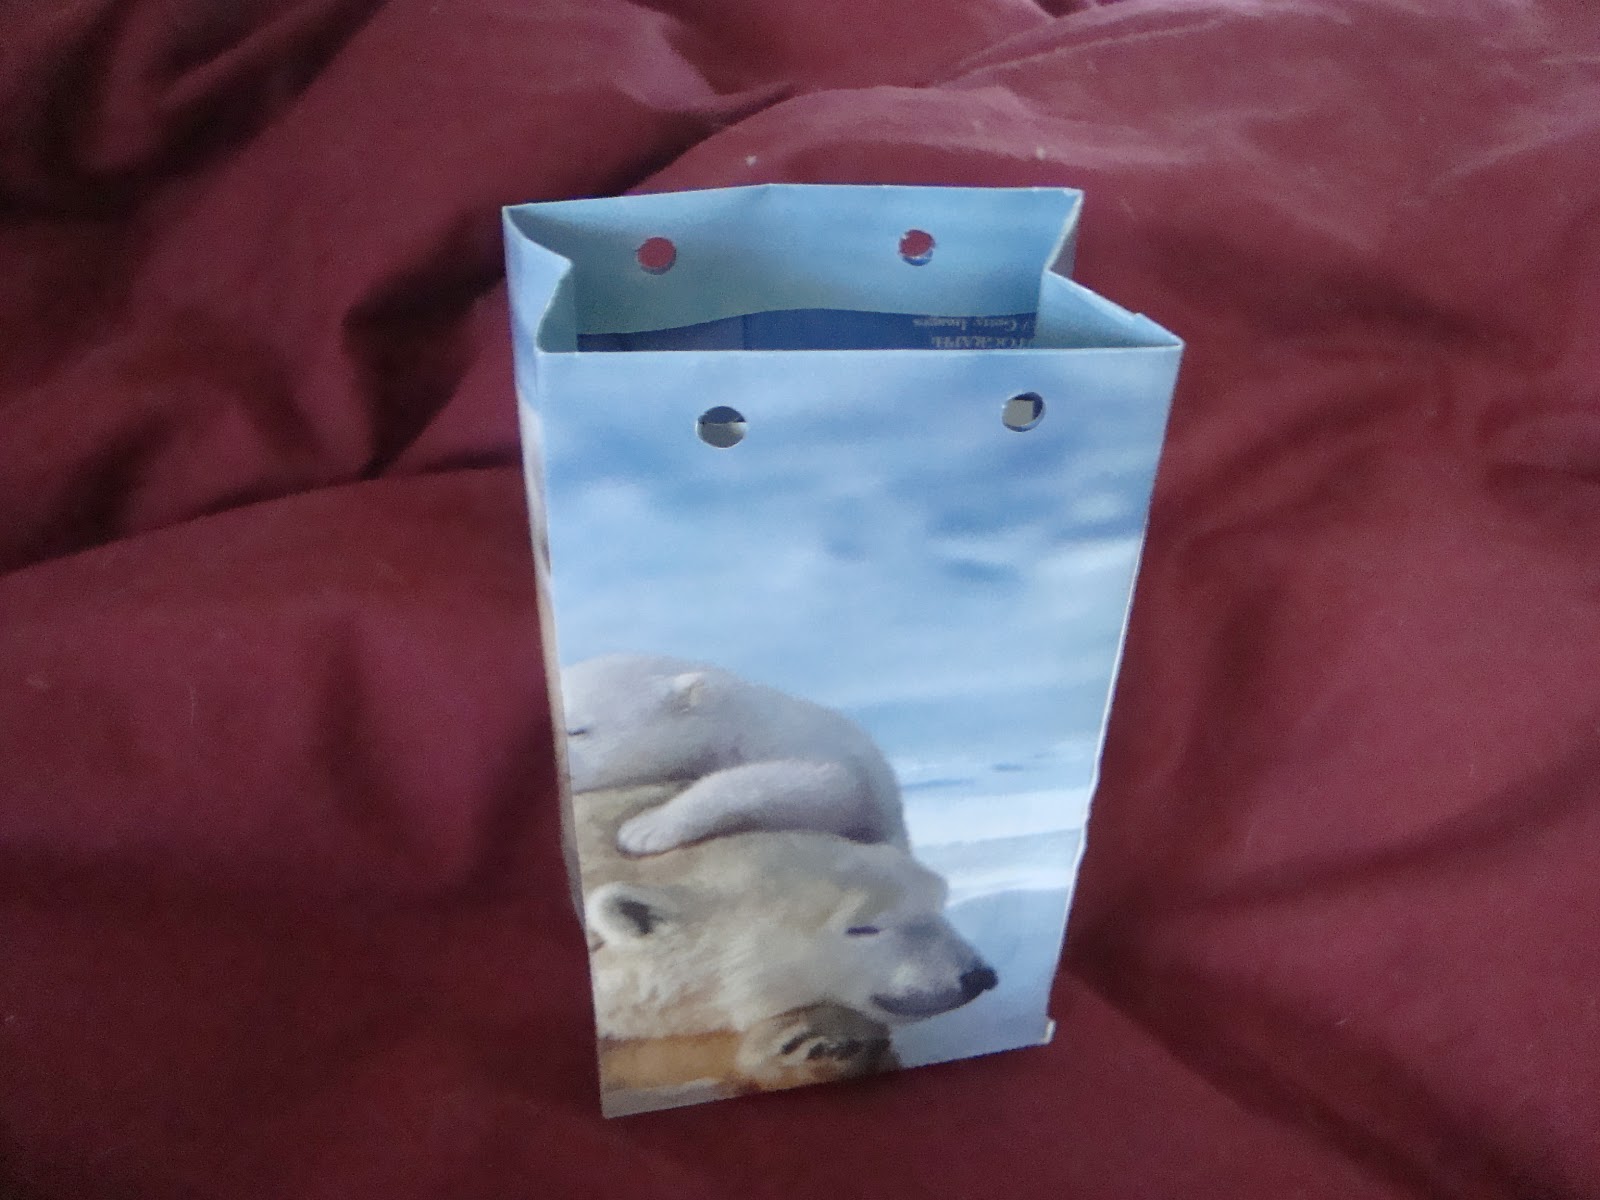
Here's a purposeful repurpose for old calendars with beautiful pictures. Make them into gift bags for Christmas, birthdays, and other gift giving occasions!

I made a pattern that can be adjusted for the size of your calendar page.
Just draw it out on scrap paper first to make sure all the measurements work then cut out on the solid lines and crease on the dotted ones.

You'll want to fold the top section down first. Then glue the side flap so you have a rectangle.
Next, glue the bottom flaps to each other with the bottom side flaps tucked inside the bag.

Then, you'll need to punch two sets of holes in the top flap that was folded over in the first step.

I used shoelaces to make the handles but you can use whatever you like (yarn, cord, etc).
 Just tie the end like starting to tie shoes and string the rest through and knot the other end.
Try to make sure the handles are the same length.

This bag was pretty small but if you use more than one page and alter the pattern, you can make larger bags too!

Mike's Christmas coasters I made getting some use already!

There will be more Christmas posts to come including eggnog for breakfast recipes!!

Thursday, October 25, 2012

Acorns for Halloween

Here's a fun DIY Halloween craft to make from acorns.

First, take off the tops and coat the nut with ModPodge.
Let dry and apply a second coat.

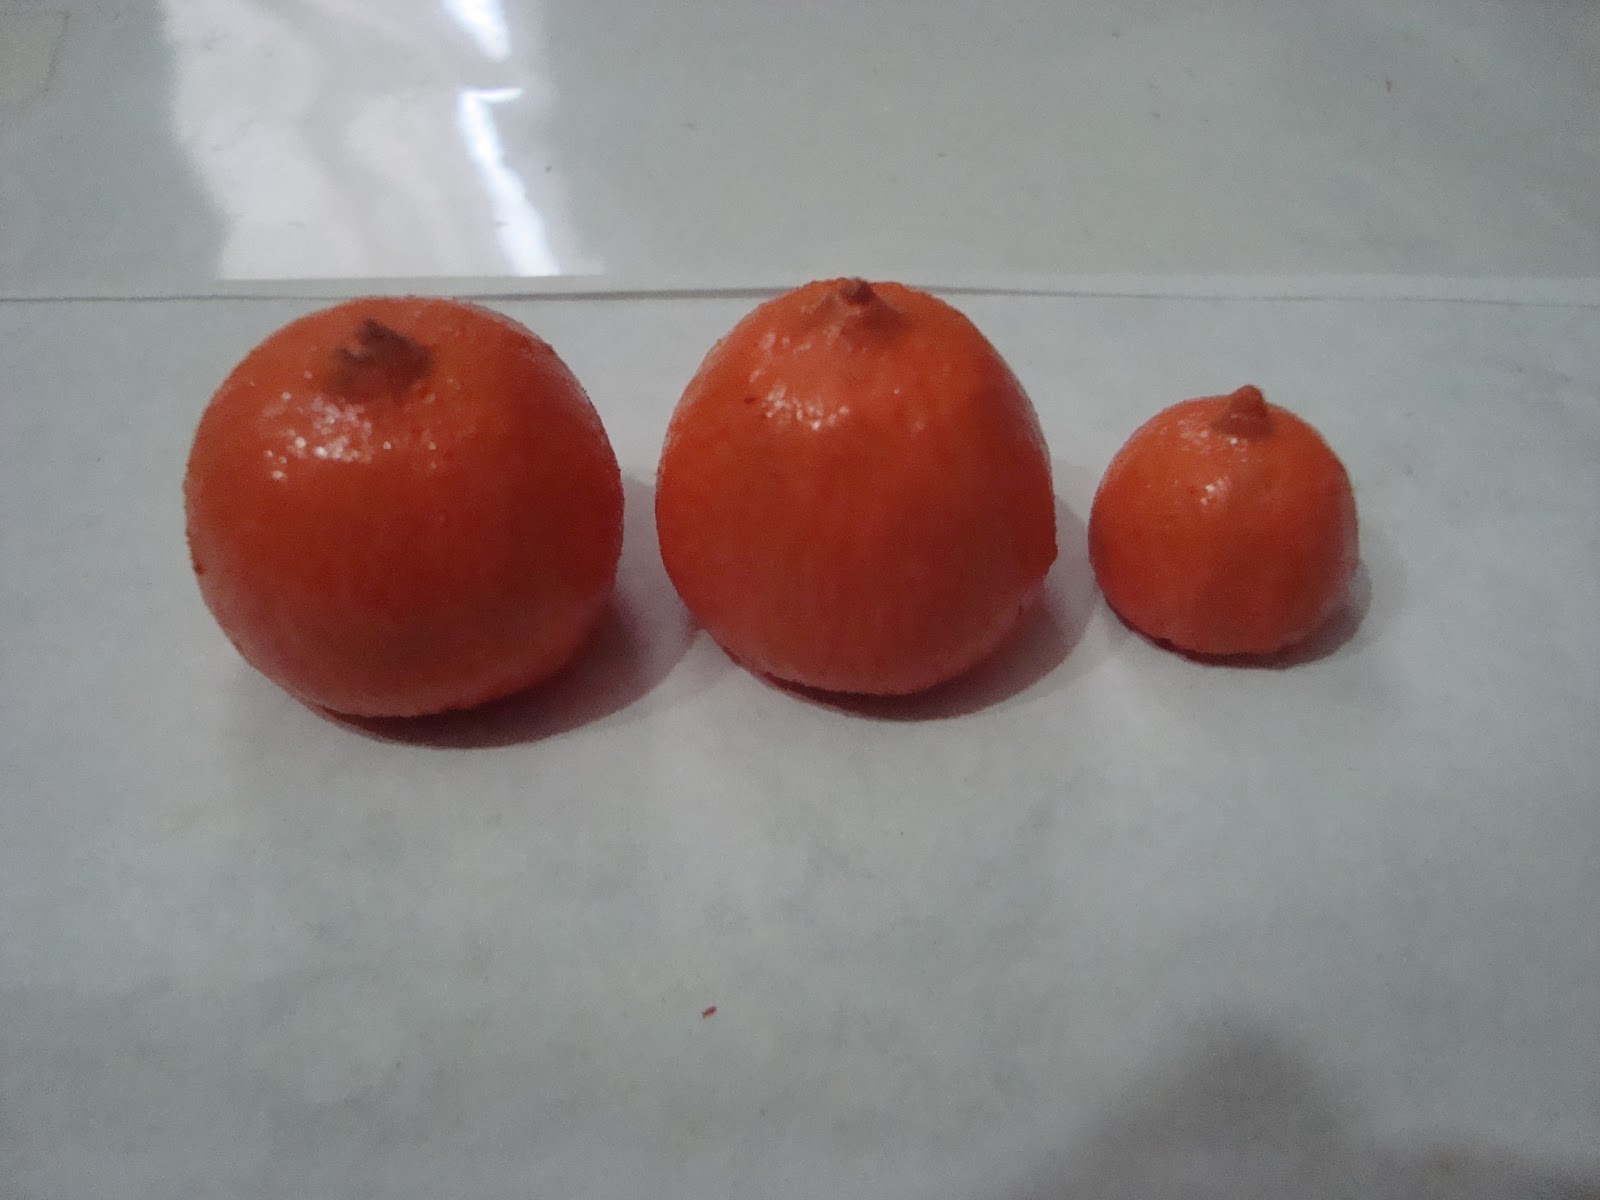
Next, paint them orange.
They already look like pumpkins!!

With a fine tipped brush, paint little Jack o Lantern faces on them.
OMGHOWCUTEISTHAT!!!!???
You could plant them all over the house, or dress up a dollhouse for Halloween, or put a bunch of them on display in a bowl...

Meanwhile, I will be carving my very first ever jack o lantern. GAH!! I'm so excited....:D
Happy Halloween all!

Wednesday, August 8, 2012

Wildly 80s T-Shirt Refashion on Whip It Up Wednesday!

Here's my fabulous T shirt's before picture. Gotta love that color!

The first cut is made. Cut off the top to make a sccop neck.

Cut the bottom hem of the shirt off and use to make straps. Just cut the straps 2 inches longer than you need them to  be.

Pin them on in place and try it on to make sure you like the length and placement of the straps.
I made one shorter than the other so it would hang at an angle.
Last step is to sew the straps in place using the extra inch  on each end of the strap as the part you sew.

Enjoy!
Related Posts Plugin for WordPress, Blogger...