Showing posts with label DIY Craft. Show all posts

Saturday, December 20, 2014

Easy DIY Christmas Decorations with Garland

Here are some easy DIY Christmas decorations!
The tree is just a Styrofoam cone (but you could use poster board shaped into a cone) wrapped with garland and the ends were secured by tucking them in so I can unwrap it after Christmas and decorate it differently for another holiday. No sense in having a million cones in my basement between holidays, right?
This is a great idea for those of us who aren't professional wreath makers!
I grabbed an old picture frame (mine happened to have cross bars that look like window panes!) and wrapped it with garland. It hangs cheerfully on my front door. You could even put a winter scene behind it so it does look like a window!

Friday, August 31, 2012

DIY Mint Skinny Jeans

As I was bumbling around on Pinterest this week, I discovered this fabulous idea from the girls at PrettyProvidence!
These colorful skinny jeans have been so popular this year!Now, you can get the look without shelling out gobs of cash. Sweet!
Here's the link to their how to:  
http://www.prettyprovidence.com/2012/04/style-for-song-diy-mint-jeans.html 
They even show you how to make regular jeans into skinny ones!

Friday, March 23, 2012

DIY Sewing: Convertible dress from skirt

I can't believe I haven't posted about this yet! Yesterday I was thinking about what to post today and saw that I still had these pics on my computer. lol.

Above is basically how I did it in a quick little diagram.
Please excuse the rough illustration..

I started with this long, straight skirt that I was going to send off to the thrift store until I realized it was missing buttons..

Well, if I have to do some work on it anyways, why not turn it into something I will use?

and besides, it's such a pretty fabric..
So I cut a strip off the bottom (approx.4 inches?)
and hemmed the raw edge of the new bottom of the skirt.

Already the skirt had a lot more swing and movement to it- I almost just quit there!

Then, I cut the 4inch wide strip in half but at an angle so they would be longer. At this point, I hemmed all raw edges I had cut.

I only had to cut the strip once because my skirt had buttons down the front so I just had to open it up on the other end to get 2 strips of the same length.

If you're using a skirt without a button down front, you would need to cut twice- once angled like this and the other a cut straight up and down.

Next step is to sew each strip onto the waist band of the skirt.

Take the straight edge of one strip and pin it in place on the front of the waist band.
Repeat with the other strip then try it on to make sure you get the coverage you want before sewing it in place.

Now it's time to sew the top on! I stitched mine in place behind the waistband.


This is my favorite way to wear it.

I bring the strips up the front and cross them in the back then bring the ends around to the front and tie them in the middle!

Side view!

but it can also be worn as a halter or just as a skirt with the strips wrapped around the waist, or whichever way you can make it work!

Little Gaston is not much help to mommy with the sewing. If anything he's a pest and you just don't get between me and my sewing machine!

So he was put out and the door shut behind him but not to be deterred..
Reminds me of Jack Nicholson in the Jacob's Ladder posters!LOL

So? Whatcha doin'?

Friday, March 16, 2012

Sewing project- Adding a bra top to my dress

This is what I was up to last night: I wanted to add some support/ coverage to the top of this dress but rogue bra straps are not a good accessory


It just worked out that I had an old bra (with padding, yay!) that had worn out straps.

Instead of throwing it away, I cut all the straps and band pieces off. The cups and the little piece that connected them to each other was left.

Then I pinned it in place on the dress. Try it on to make sure it's where it should be (without stabbing self with pins).


All that was left was to sew it in place.

 The dress has a lining behind the chest area so I stitched carefully not going through both layers. This kept the stitching from showing on the front :)

Looking good!

and feeling crafty!


Friday, February 17, 2012

Handmade Valentine Card

This Valentine's Day I wanted a card to say exactly how I felt about him..

..So  I made one!


I even busted out my alphabet stamps :)

It was so much fun!
Did any of you make anything special for your Valentine?

I will post more next week but for now, I am off to the big dance weekend in Saratoga Springs!

To give you a teaser, next week's post will be very 'pin up,' so if you go for the vintagey and artsy stuff be sure to check it out!


Friday, February 10, 2012

Cute Little Chairs Project

Don't throw out those caps from the champagne bottle anymore!
These chairs were fairly easy to make and absolutely charming :)

These are perfect little injections of whimsy for a dollhouse or for your house!

Just unwind the wire that runs around the base of the cap (where the bottom of the chair's legs are in the picture) and use that piece to form the back of the chair. I wrapped the ends of that piece of wire around the back legs of the chair- pliers are really helpful here.

You can make all sorts of different styled backs for the chairs. This shape seemed to happen easily on this one.


Happy crafting to you!
Tip Junkie handmade projects

Thursday, February 9, 2012

Frilly Valentines for the ladies!

These are for my girlfriends. They are so sweet and girly!
Delicious! It just occurred to me that they are in conversation heart colors...

...now I want candy.

It was pretty easy to make these, the hardest part being the 'what to put on each one to make it unique' part.

I drew this shape on paper and used it as a template to trace over thin cardboard (recyclers note: use cereal boxes since one side will be covered)

Cover the top half with newspaper and "dress" them up! I used stamps, lace, fringe, tissue paper, ribbon, images from magazines, embroidery thread, and markers.

You can cover the back with white paper or just write directly on the cardboard for a more vintage feel :)

I was thinking of running some thin wire through each side so they can be hung on a doorknob or something. Who wouldn't want to show these off?

On a sad note, a dear friend passed away last week so I was busy trying to find the right words for the darling woman he left behind.

Which left me wondering, why don't more people write letters?
We all love getting them, right? Or am I in a minority?
I just finished a book about a fighter pilot in WWII whose life was pieced together from all the letters he sent to his loved ones.
How cool is that?!?
Will anyone be able to piece our lives together when we are gone?

Thursday, February 2, 2012

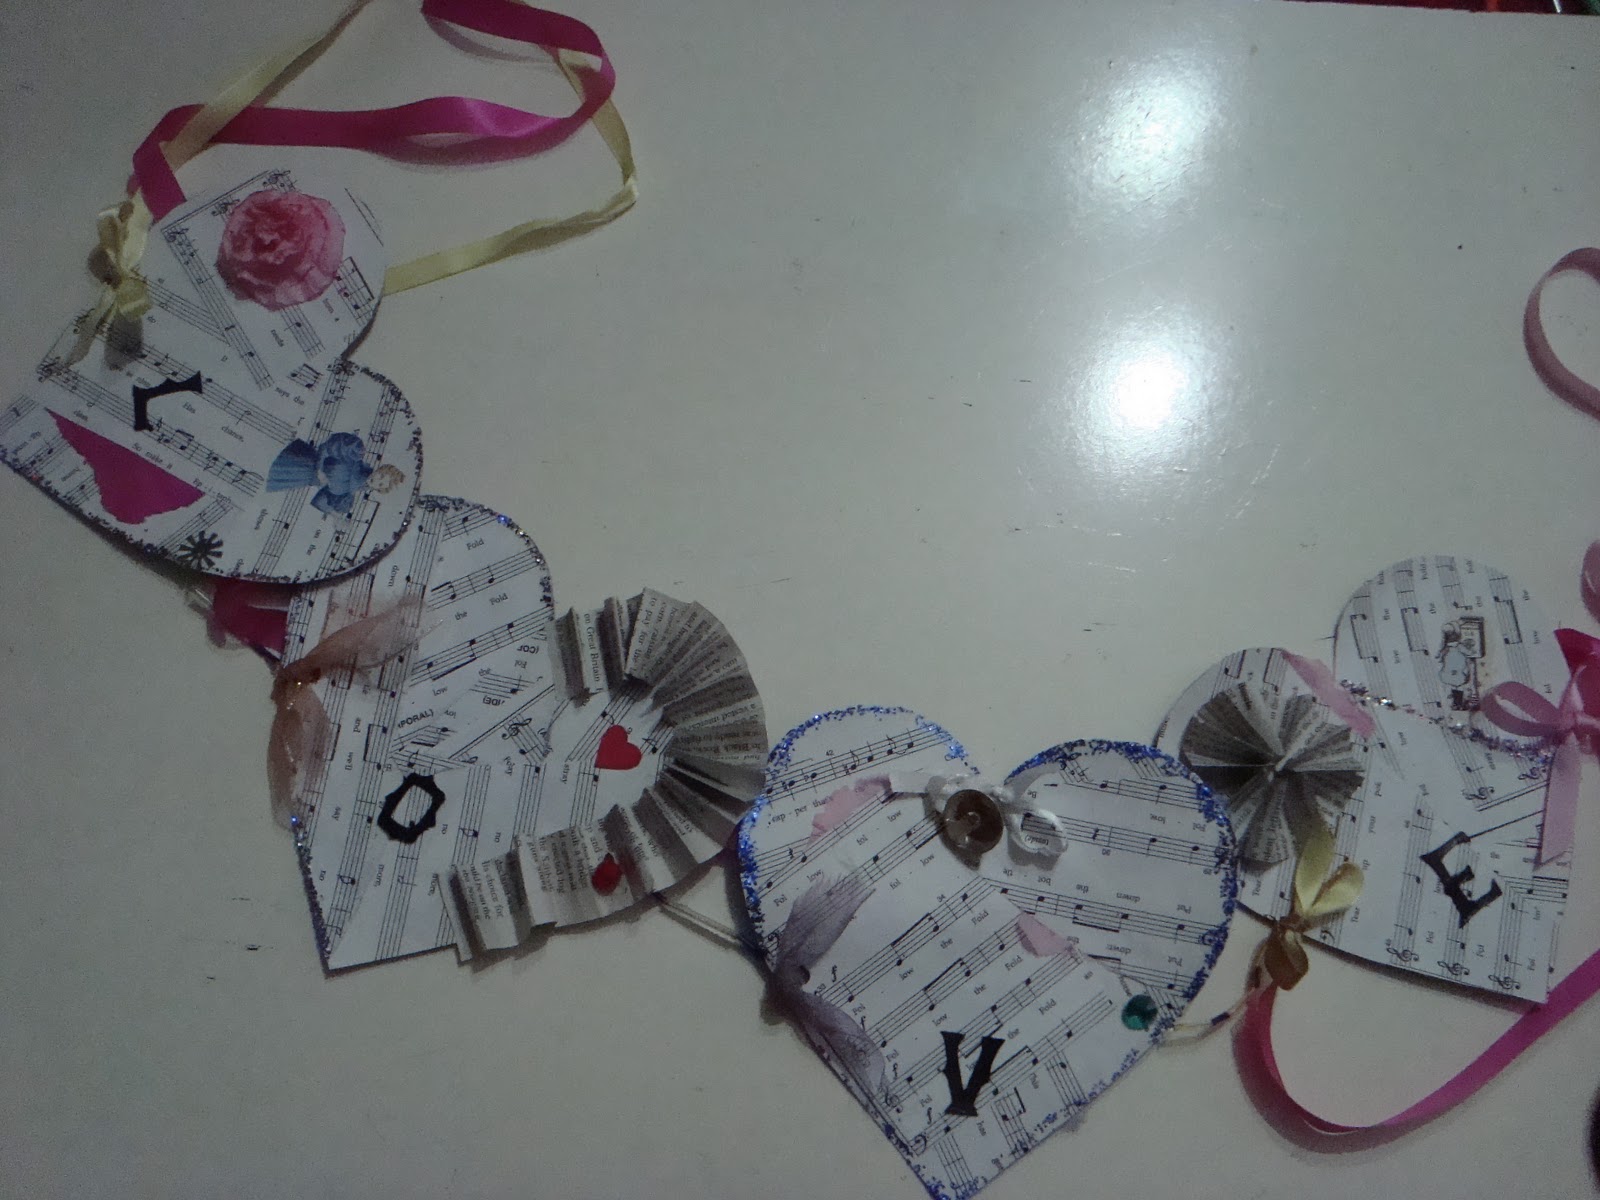
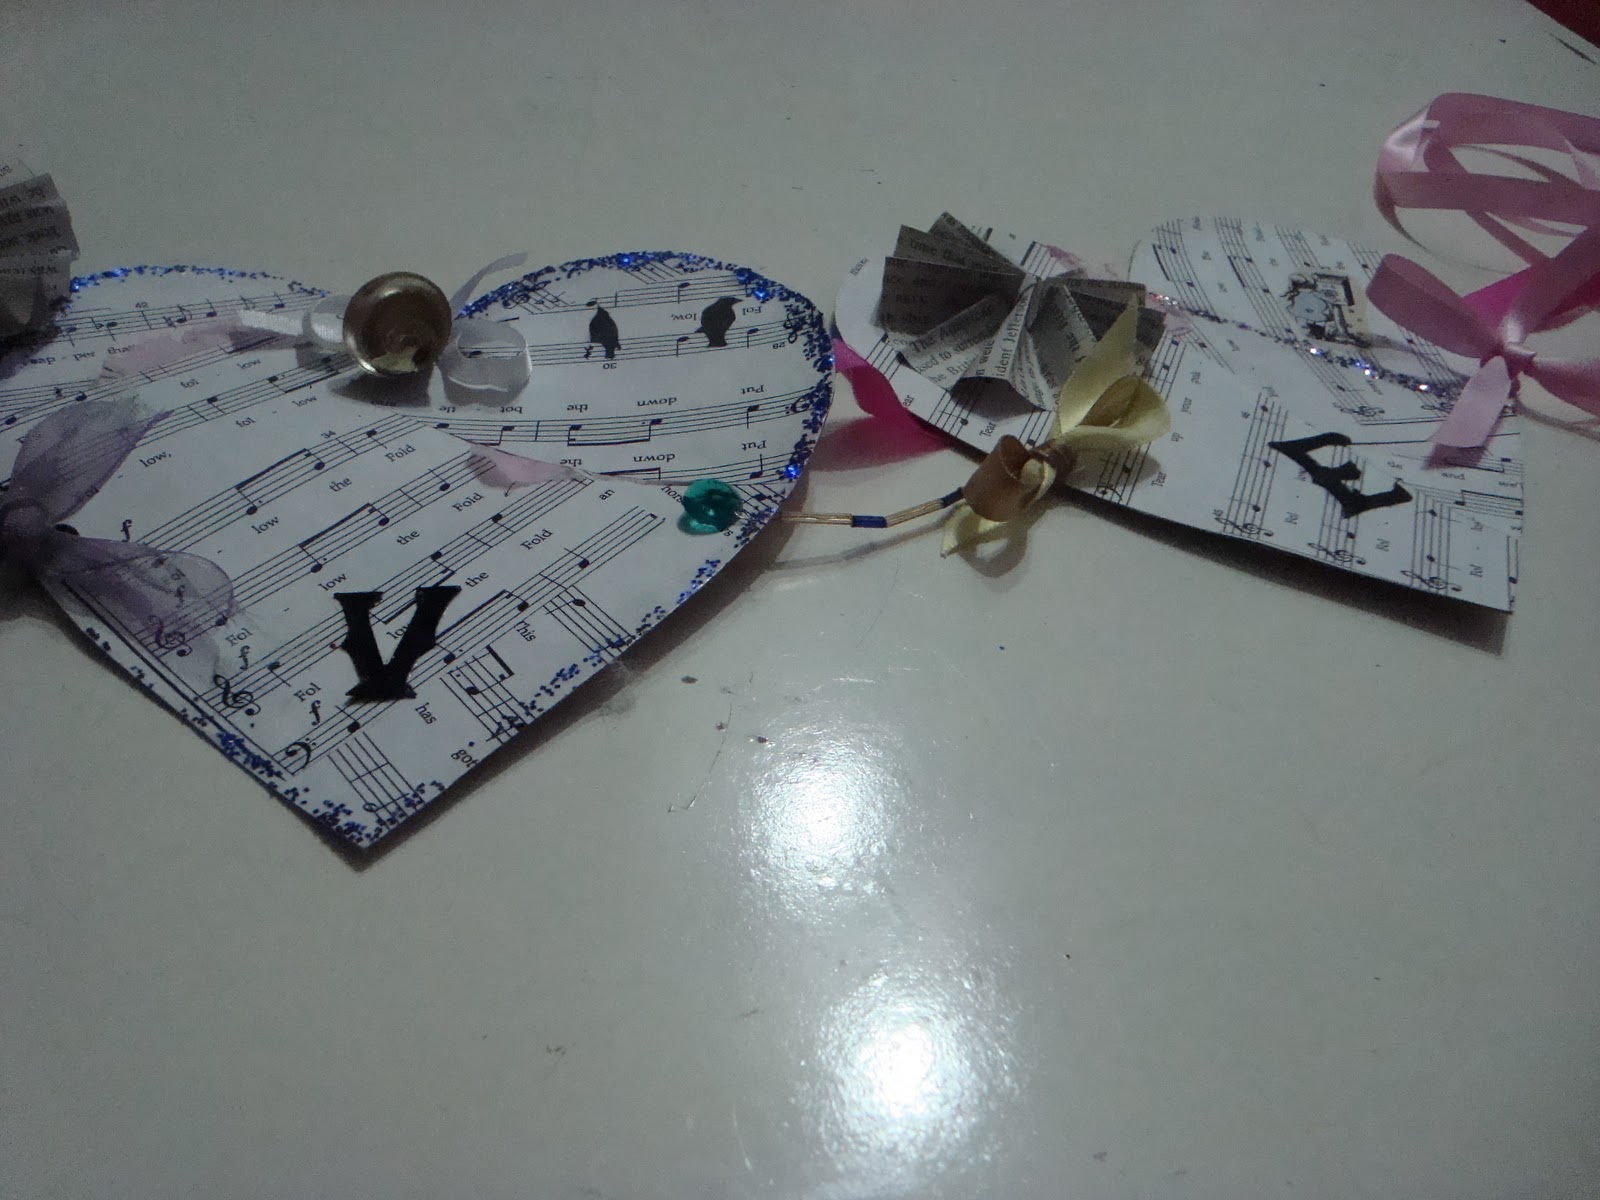
Shabby Chic Banner of Love

This week I've been working on this love-ly banner for Valentine's Day, get it? lol.
How pretty this could be hanging across a mantel or in a window!

I cut 4 hearts out of a thin cardboard- cereal boxes would work.

Then covered them with music papers. As you can see, I stuck some torn bits of tissue paper in along the edges of some of the pieces.

The letters were drawn on to the extra cardboard (pretty good for freehand, huh?) and cut out with that red cutter-majig(try googling that 5 times fast!) tool in the picture. Paint them black and they're ready to go!

Accordion folds! Ribbon scraps!

I love the gorgeous tissue paper carnation on the "L" heart. Hmmm..could be an awesome tutorial coming soon!

These hearts have been glitter bombed! I punched a hole in the top so I could tie the mini bell on the "V"


The newspaper pinwheels were a nice touch. Another tutorial possibility...What do you think?

Friday, December 9, 2011

ATC Christmas Ornaments and Gingerbread houses

This year, several of my friends got a sweet little surprise with their Christmas cards...THESE!
Instead of using a playing card to create these ATCs(Artist Trading Cards), I used a Mike & Ike box {I love those things}. I did use a playing card to trace its shape on the cardboard and cut it out. This was perfect because it is white on one side so I can put a nice holiday greeting on there.

I covered the other side with old wrapping paper from Christmas presents past and stamps from last year's cards! In the middle is a rolled paper rose and stamped across the top reads: The Magic Of Christmas.

With a hole punched in the top, these can be laced up with a pretty ribbon and displayed on the tree for many years to come!

I went to see the gingerbread display at the George Eastman House in Rochester, NY and here are some of the delights to be seen..


Townhouses next to the RVer's Christmas paradise

Then, I came across this real life gingerbread house! How Gorgeous!! Someday, I will have a beautiful house like that..

Saturday, December 3, 2011

Detergent Dressed up- Sew cute!

I've been slack about posting lately- so sorry friends! I've been crafting up a storm, though, don't you worry! Here is a perfect way to use up some of those fabric scraps.

This post is just in time for the gift giving season! and, hey, don't have enough time or patience to make one yourself? Guess what? I sell them, email me: conniw_98@yahoo.com "LadyofWhimsy" in the subject line for more info.
I made this for my mother's birthday this year and she loves it!

 It was super easy- I cut out two pieces of fabric in the shape of a light bulb, sew them together (right sides facing) leaving an opening at the top to turn it right side out, bind the open end with a piece of ribbon folded over, then use fabric glue to put the neck and waist ribbon on.

easy right?

The neck slips on over the top of the detergent bottle and then tie the waist in the back.

Or, if you have enough ribbon, you could wrap it around to the front and tie it in a cute bow!

You could even put lace around the edges or buttons/flowers/ ric rac on the bib. Play with it and have fun!

So cute! An easy way to add a touch of whimsy to an otherwise boring area!
Stocking stuffer??
Related Posts Plugin for WordPress, Blogger...